


How to Install Pipe and Drape: 12 Easy Steps
How to Install Pipe and Drape: 12 Easy Steps to Set Up Event Curtain Rigging and Drapes
If you're looking for a quick and easy way to add some flair to your event space, pipe and drape is a great option. Pipe and drape can be used to create all sorts of looks, from simple backdrops and room dividers to more elaborate decor.
Installing pipe and drape is not difficult, but there are a few things you need to know before you get started. In this blog post, we'll walk you through the process step-by-step so you can get your event space looking great in no time.
Prefer to watch a video of how to install pipe and drape?

Before you can take advantage of the flexibility of pipe and drape, you must first learn how to set up pipe and drape.
Here is a list of the standard pipe and drape support items and their purpose:
Base Plate: The base plate is a heavy metal plate that goes underneath each upright with counter-sunk hills in the centre and around the plate where spigots are screwed. The base plate provides overall stability and support to the pipe and drape system.
Spigot: The spigot is a small pipe with a threaded screw at the base. It is screwed into the base plate to hold an upright.
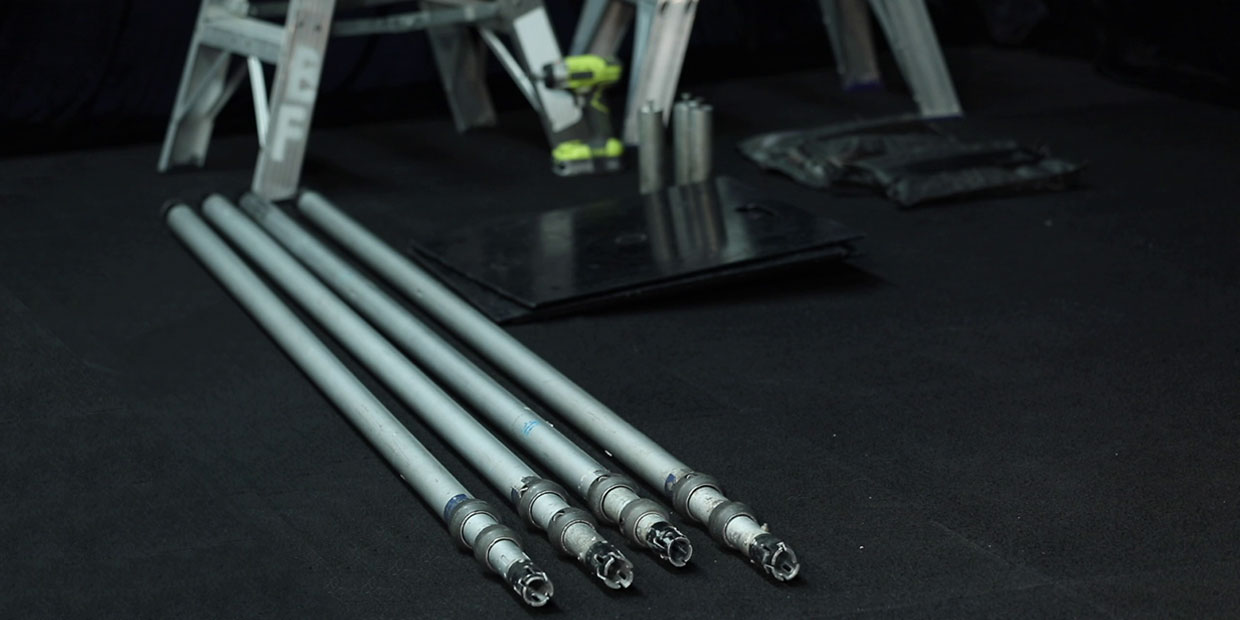
Upright: The aluminium upright that creates the overall height of the pipe and drape kit. The typical uprights are two and three stage uprights that can be lifted and locked at heights of up to 6 metres tall.
Cross Bar: The cross bar is an adjustable horizontal pipe that serves as both a support between two uprights and a rod for hanging the drape.
Shot Bag: The shot bag is used for securing the bases of uprights. The shot bags' flexible characteristics are produced by the inclusion of tiny metal pieces in the bag's composition. Each weight has a webbing strap handle for simple transportation.
Drapery: Event draping is often used to divide a large space into intimate rooms and hide unused areas. They can also provide vibrant backdrops to create a focal point to an event stage and event the entire event room.
1. Lay Out the Horizontal Cross Bars
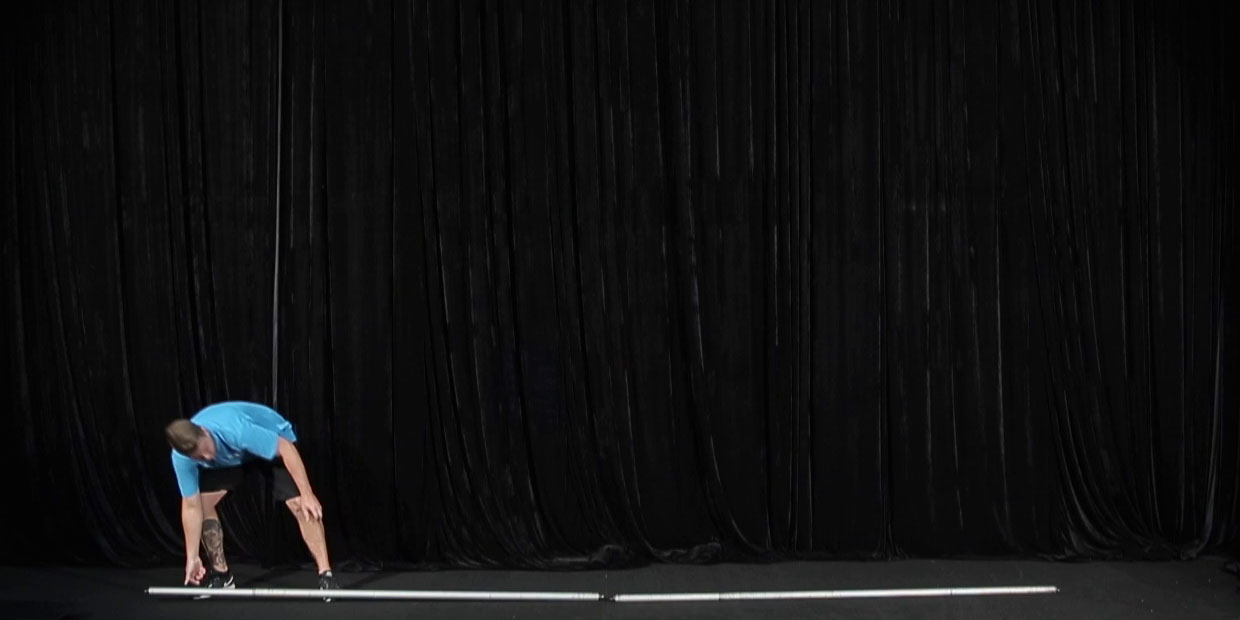
Start by laying out the drape support bars, also called horizontal crossbars. The most common length is a 1.8-metre to 3-metre adjustable horizontal crossbar, but there are many sizes available based on the needs of the space that you will be covering or the weight of the fabric you are going to hang it. Take a minute to inspect the crossbars and where each hook ends, this is where you'll be placing your base plates and upright pipes.
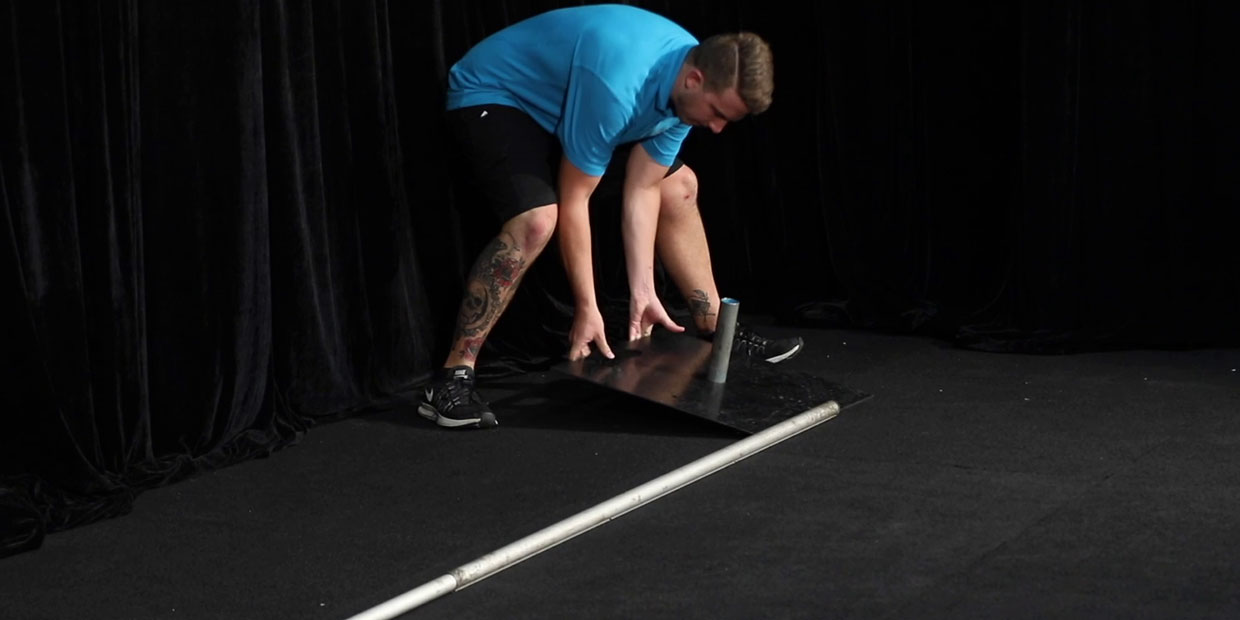
2. Attach Spigot to Baseplate
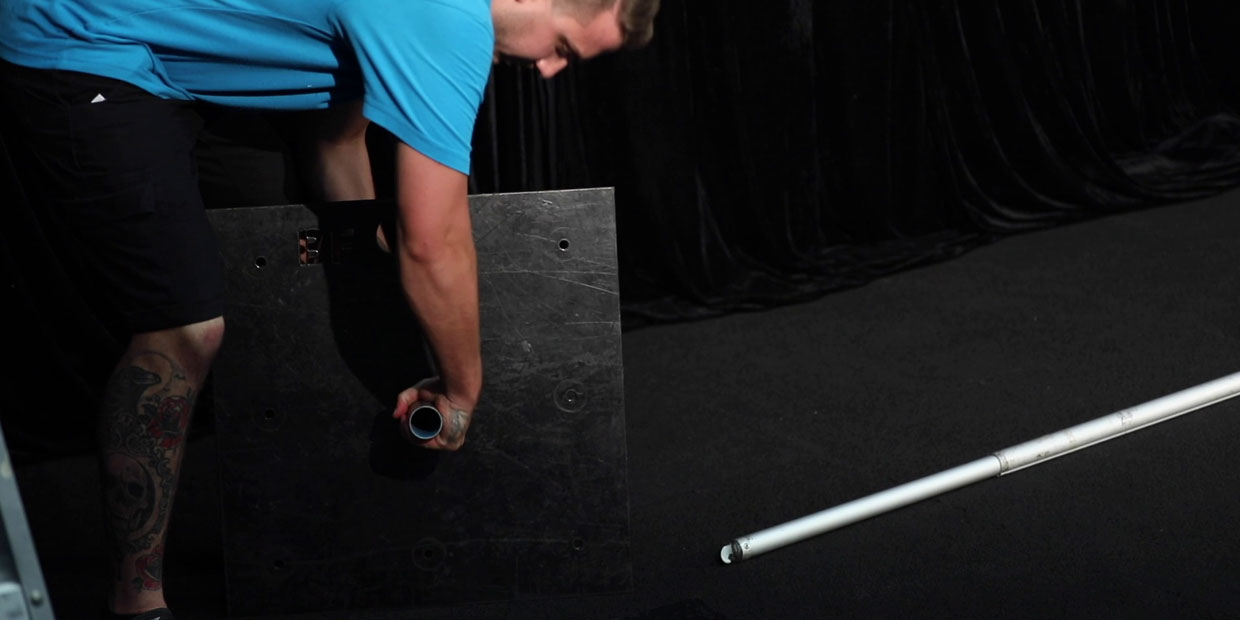
Next, attach the spigot to the base plate. The center hole is always best for maximum stability, but you can place pins in any of the available holes that makes the most sense for that upright placement. If you use a non-centre hole, or if you'll be using tall drapery, make sure to add extra weight with a weighted shot bag. Some venues such as the Gold Coast Convention Centre now require 30kg of shot bags for each upright and that the handles of the uprights be positioned over the spigot before the upright is inserted.
3. Lay Baseplates at Every Cross Bar
Using the positions of the horizontal crossbar hooks from Step 1, place a base plate at each hook end of the crossbar. To ensure a consistent visual look of the base plates, position the handle of the base plate on the side that will be hidden from view when the drape is attached.
4. Attach the Vertical Uprights to the Spigots
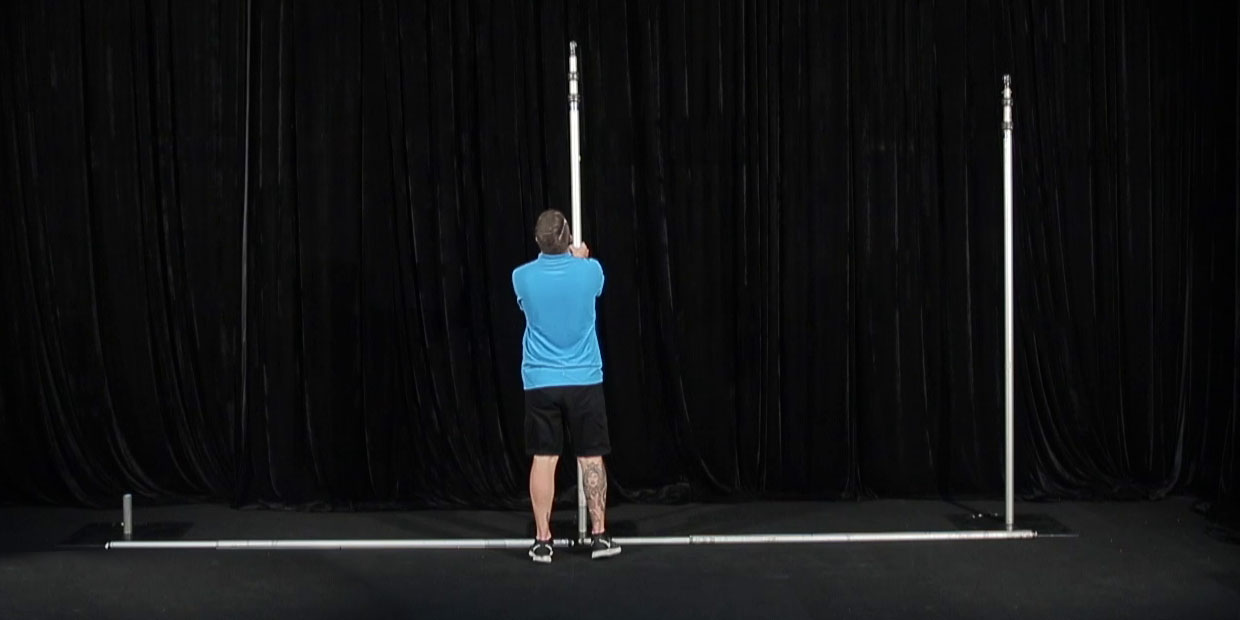
Now, slip the adjustable or fixed height upright over the base pin. If your upright is adjustable, and you do not have a ladder to use when hooking your horizontals into the top of each upright (see Step 6), keep it at its lowest position for safer setup. If you do have some ladders to use for Step 6, you can raise each adjustable upright to the final height now.
5. Hook Cross Bars to Each Upright
Next, hook each end of the cross bar into a slot that is located at the top of the vertical upright pipe.
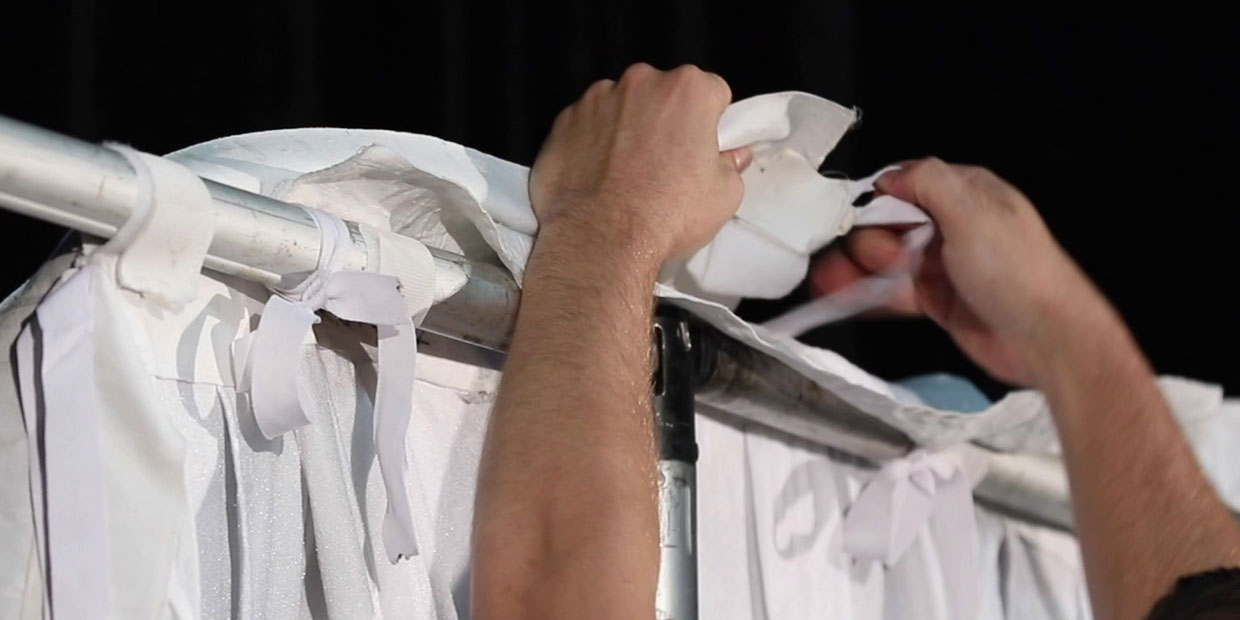
6. Tie Drapes Onto the Cross Bar
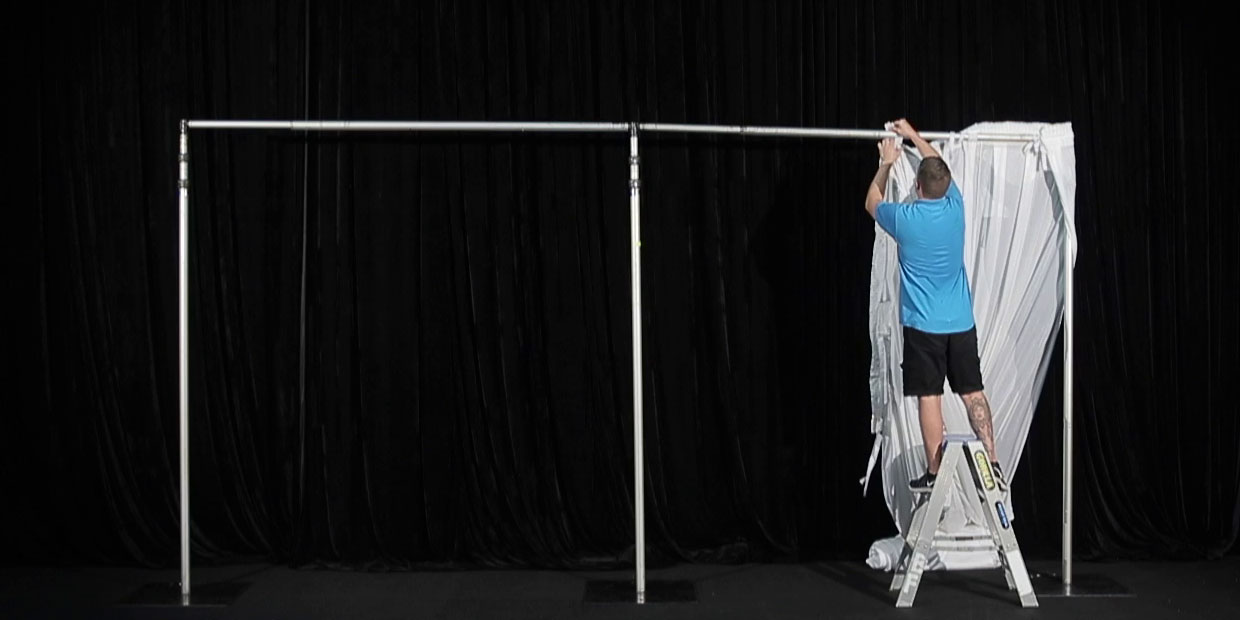
Start by attaching the drape ties to the cross bar. To ensure that the upright pole is covered, wrap the drape's end around the last upright.
7. Overlap the Drapes
At the end of each drape ensure that at least 100mm of drape is stretched over the previous drape.
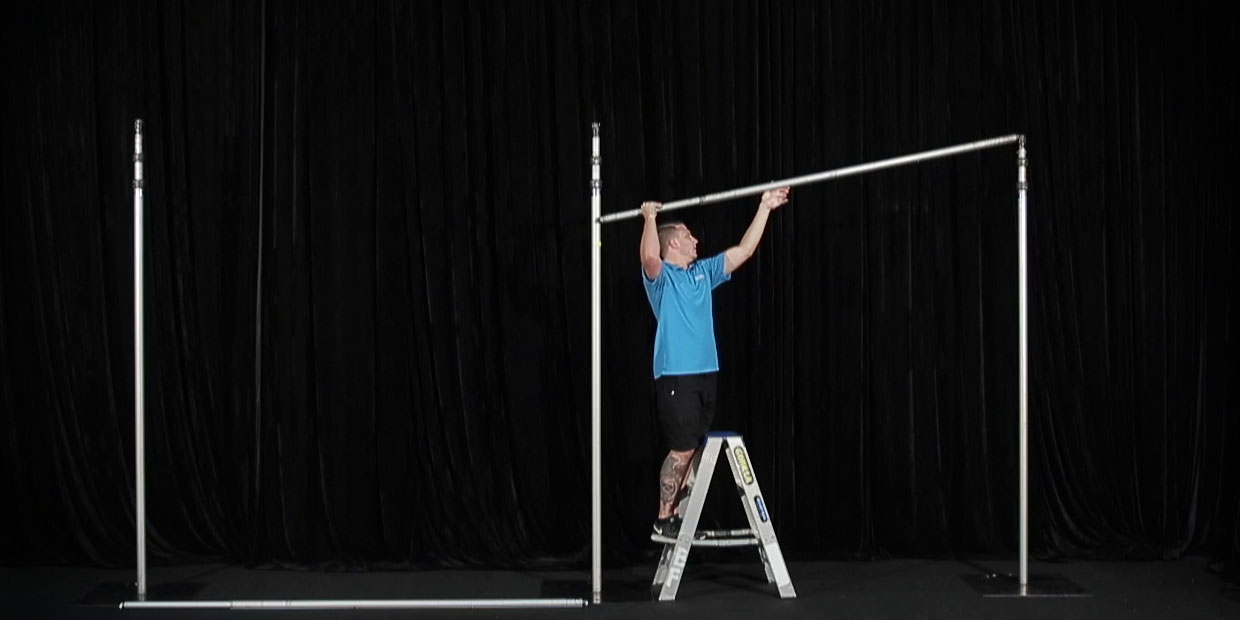
8. Lift the First Stage of the Upright:
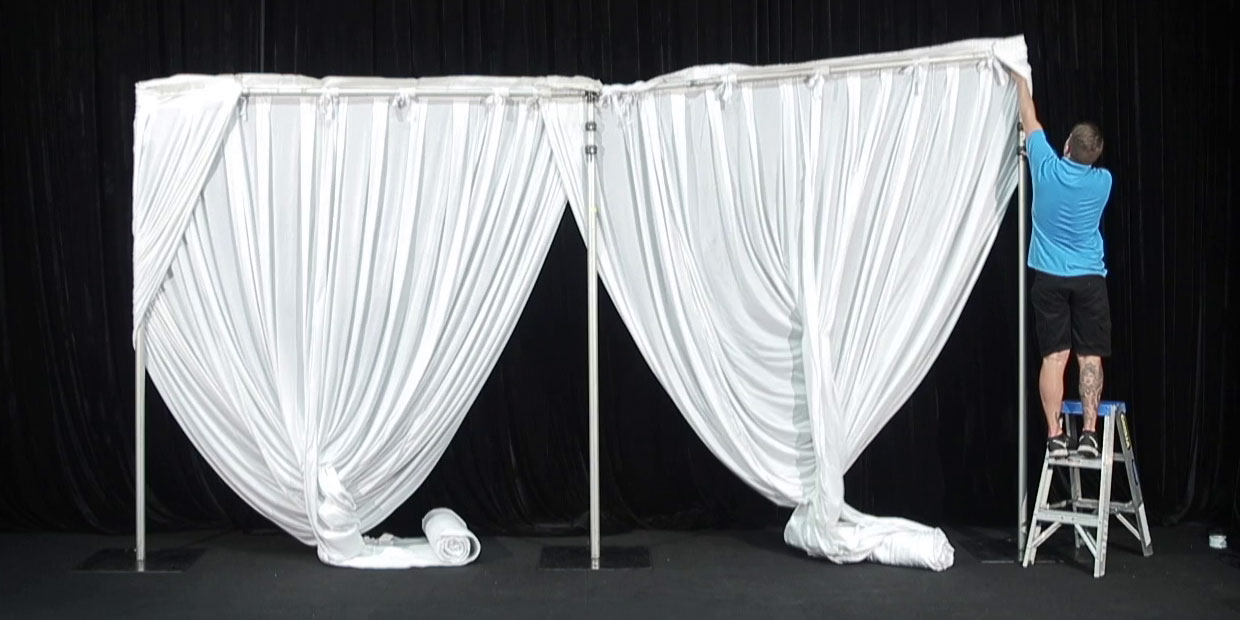
With the use of a step ladder raise the first stage of the upright. Start by only lifting each upright a metre so that the crossbars do not jam at a tight angle.
9. Continue Lifting the Second Stage Upright
Continue to lift the uprights until a silver tape line indicates that the maximum height has been reached. Then move to the second stage of uprights and again continue until you reach the desired height.
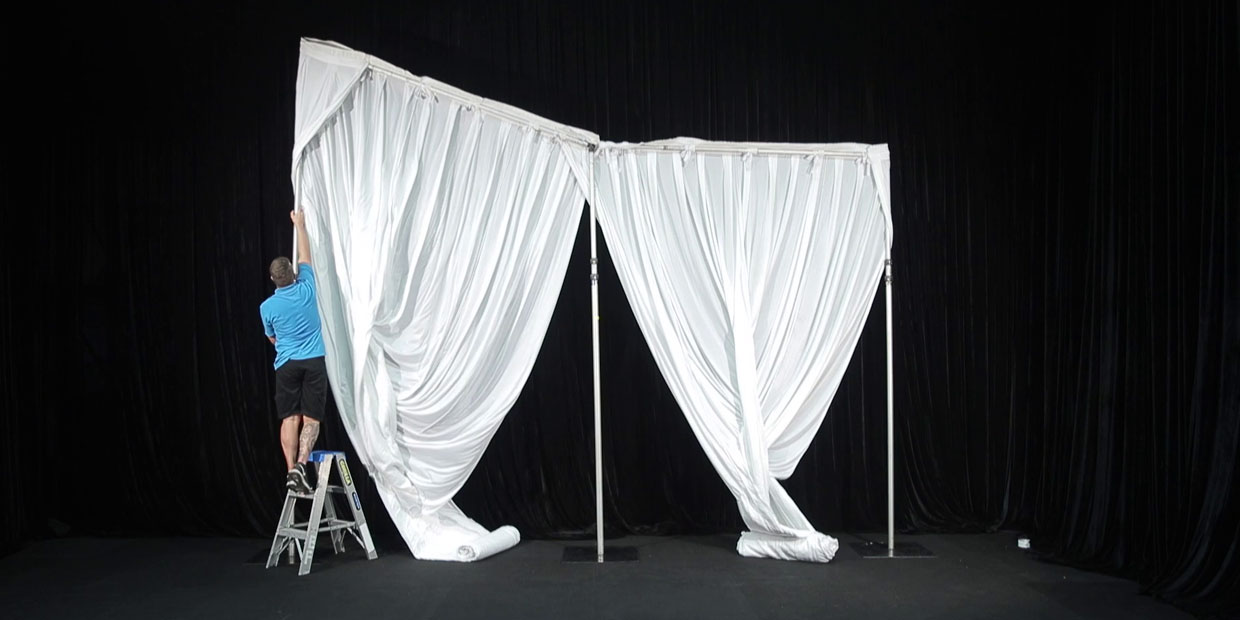
10. Check that the Drape Rigging Height is Level
Take a few steps back and see if the drape height is level. You may need to raise or lower the uprights to ensure the drape height is level.
11. Fix the Base of the Drape Evenly
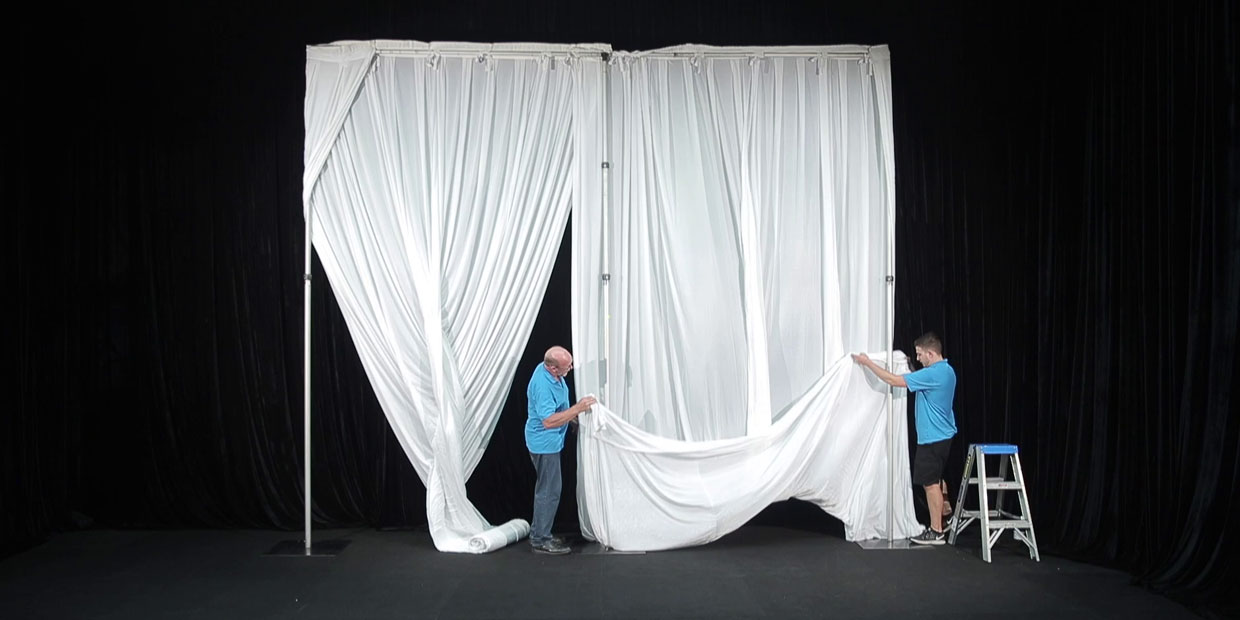
With a second person lift the drapes at each end so that the base of the drape is even across the floor and at the same time drop together so that the base of the drape is even.
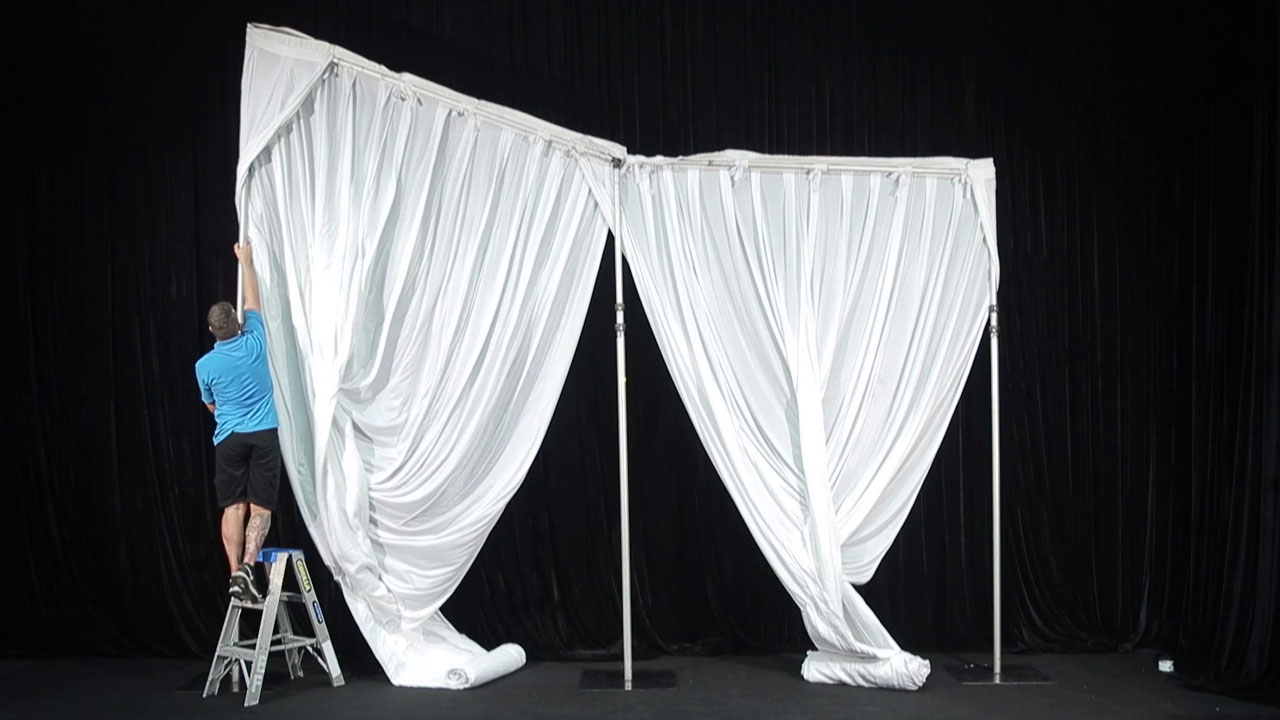
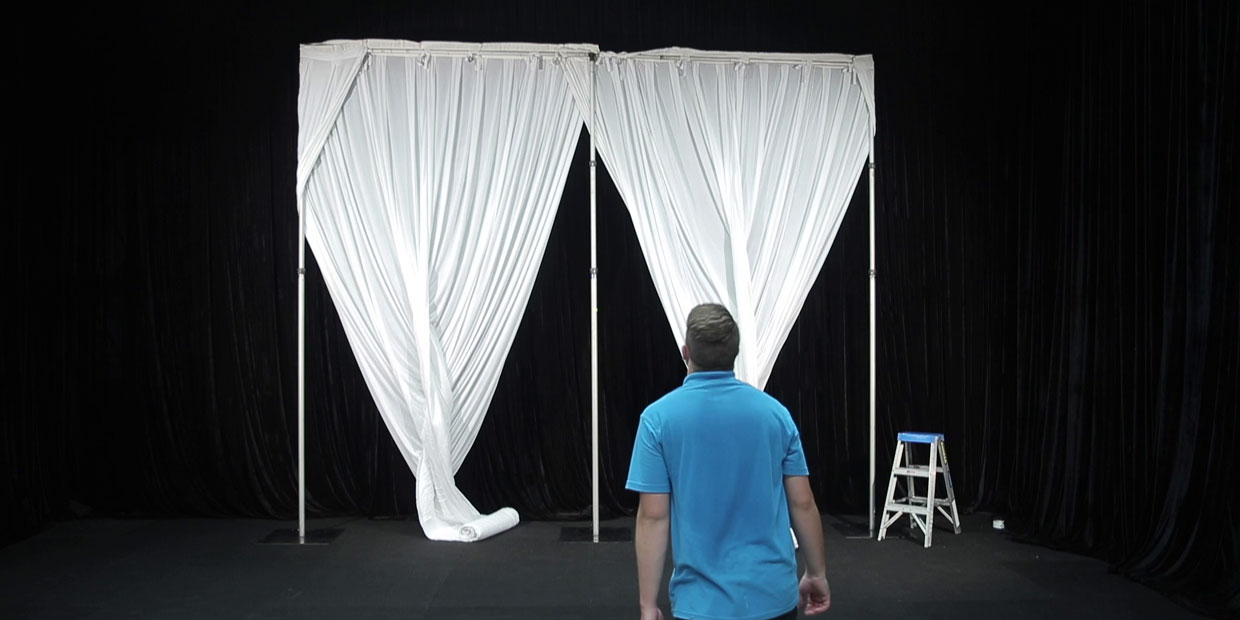
12. Correctly Installed Pipe and Drape
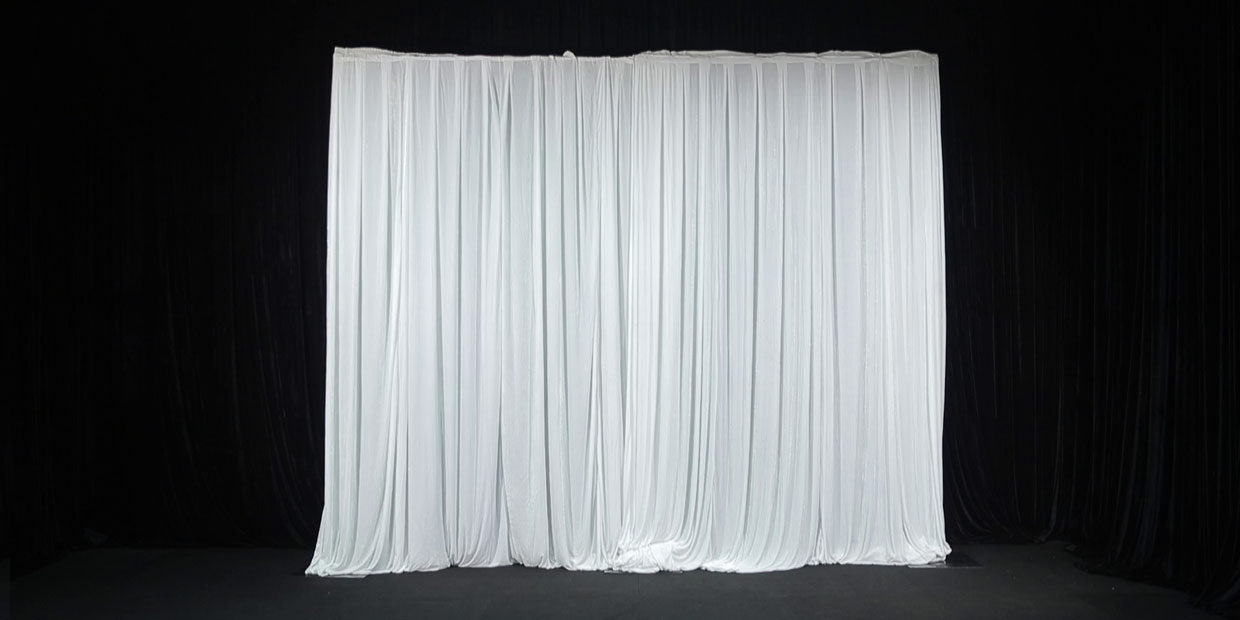
When the pipe and drape system has been installed correctly, the wall of drapes will look even and create the perfect backdrop for any venue or stage.
Events Fantastic is your Pipe and Drape Solution
Pipe and drape are a great way to add some flair to your event space. It's quick and easy to install, and it can be used to create all sorts of looks. If you are planning on using pipe and drape at your next event, contact the team at Events Fantastic. We'd be happy to help you get started.